Create a report with the QuickViewer (SQVI)
Often you just want to create a query because you can’t get the information from a standard SAP report. This can then be created relatively easily with the QuickViewer (SQVI) or the Query Designer (SQ01).
In the specific case, I want to create a query about users and display their email address and SNC configuration. The e-mail addresses can then be used, for example, for an e-mail to a dedicated group of people. The SNC configuration is needed to check which users do not have an SNC configuration yet.
To create queries, SAP offers the QuickViewer for user-specific queries and the Query Designer for specific groups of people.
Important for the queries is to know which tables we have to address. In this case, the required information is equally distributed over four tables. In addition to the e-mail address and SNC configuration, the SAP user name, first name, and last name should also be displayed.
Create report with QuickViewer (SQVI)
Therefore we need the tables: USR21, ADRP, ADR6 and USRACL. We start with transaction SQVI and create a new query.
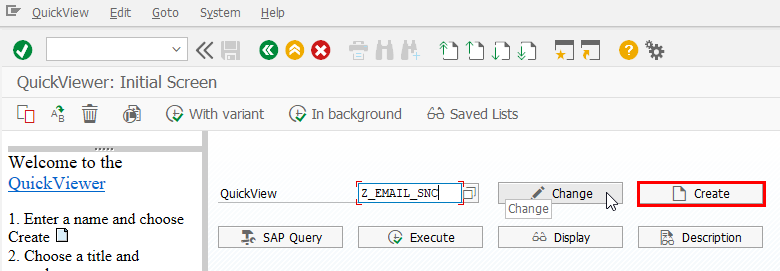
In the query, we then select a table join, since we want to link multiple tables together.

The tables are then inserted individually. We will start with the USR21, as this is the table to which the other tables will link. When adding the individual tables, the system links the tables independently. This will be adjusted when all tables have been inserted.


As you can see, the tables are essentially linked via BNAME (SAP user name) and PERSNUMBER (unique ID). The USRACL is an exception here for now, which we will correct.
The links should all be created directly with the USR21 table. Therefore, the links between ADRP –> ADR6 and ADR6 –> USRACL must first be resolved. To delete these links, right-click on a link and use the context menu to delete the link.
Customize table links
The table link must then be recreated. Once for USR21 –> ADR6 and then for USR21 –> USRACL.


The links are set automatically again. In this use case, they are also correctly associated with BNAME and PERSNUMBER. But you could also correct the link manually with the “handle”.
The tables are then displayed as follows:
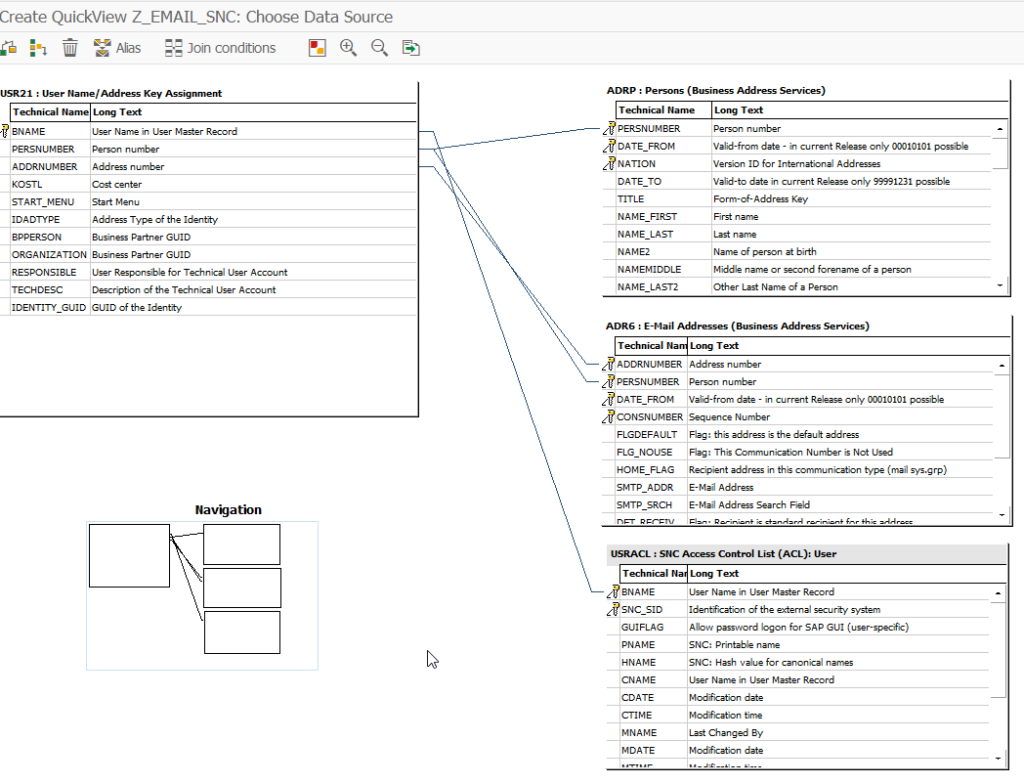
Now one is almost ready. But we still have a problem with the current configuration. We would only get back the records that meet the selection condition on both sides, since an INNER join is used in the standard.
Or in practical terms, if we search for users without email address, the query will not work.
Therefore, we need to change the join conditions for USR21 –> ADR6 and USR21 –> USRACL to left-outer join. Thus, we also get users without e-mail address from the ADR6 table and users without SNC configuration from the USRACL.
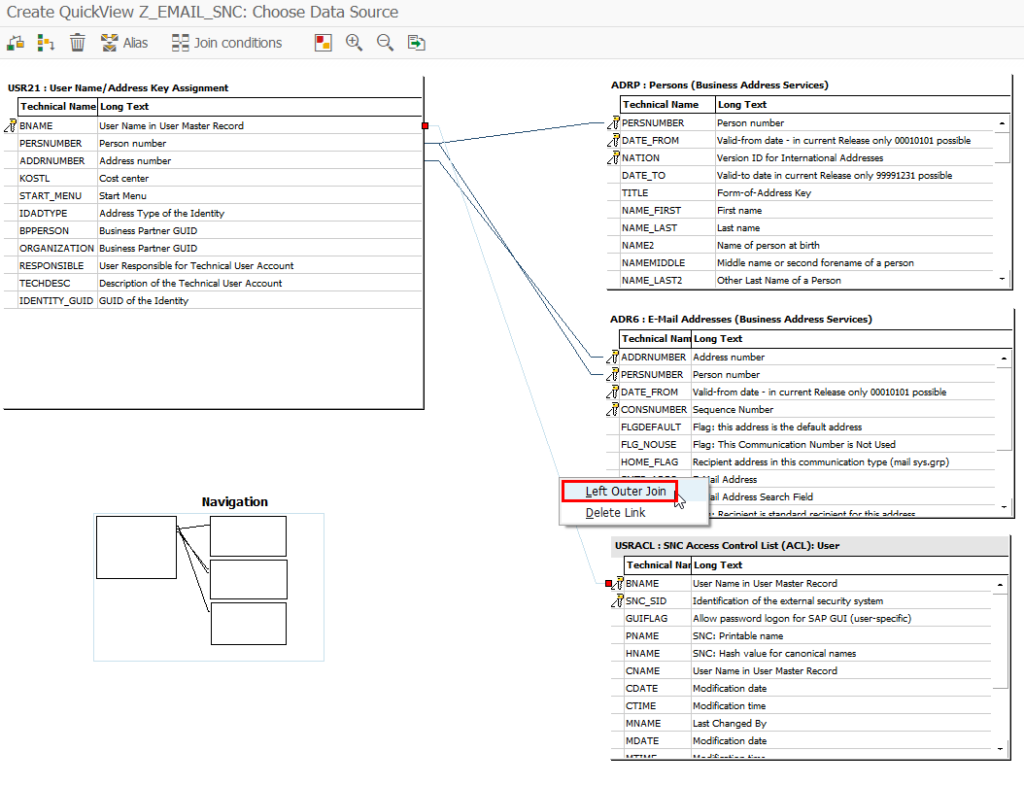
The join to the ADRP does not need to be adjusted in this example, since the first name and the last name are selected here later and I assume that these are given.
The join to ADR6 only needs to be adjusted via a link. The final result looks like this:

This completes the table configuration. You can’t save it at this point. Go back here with F3 and we come in the QuickViewer to the initial screen and the basic mode.
Here we define which data we want to be displayed after running the report (display fields) and which data are available as selection fields. This does not have to be a 1:1 match.
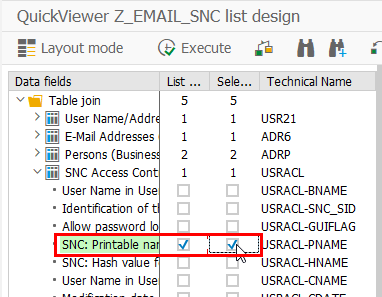
Important to know, the order of selection also determines the order in which it is displayed in the report. This means that if you want the username to be displayed first, then you should select it first.
The order of the individual fields coming from a single table can be rearranged using the display fields. However, it is not possible to change the complete order.
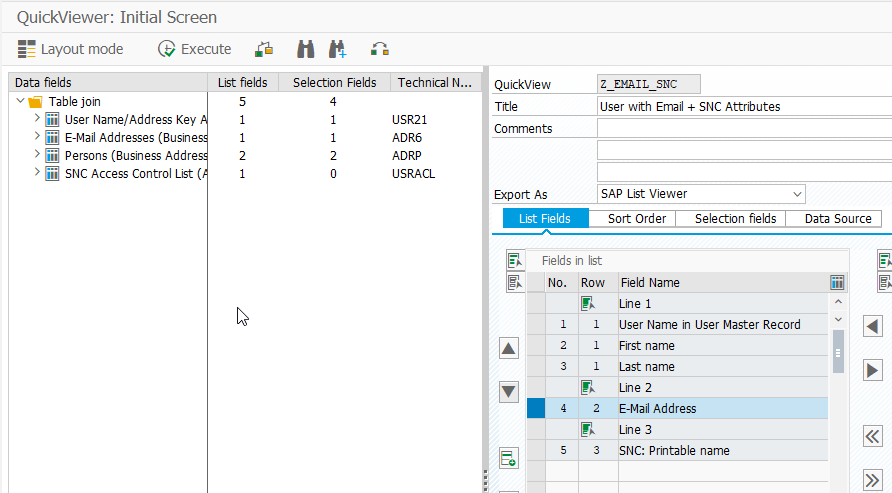
At this point you can save and run the report.

The test should now output all users. Here you should test with a known user group to check the join conditions.
In this case, the output of the users is as expected.
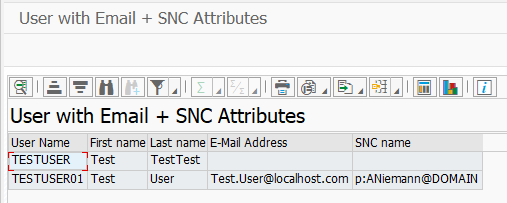
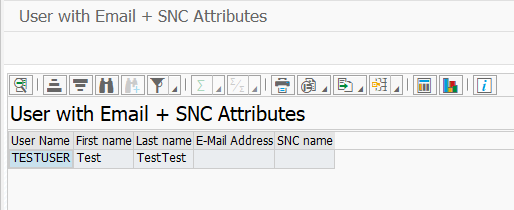
To now display users that do not have an SNC configuration in the user master, set the SNC name selection to =.

Change table configuration
If something still doesn’t fit and you want to adjust the table configuration, you can do it in Basic mode under the Data Source tab. This can also be used later to extend or adapt the report.

A small disadvantage of transaction SQVI is that this report is only available to the user who created it.
You can do this as follows.
Release report
For each report you can generate a program in QuickViewer. This program name can be displayed in the same menu item.


You can then execute this program name in the TA SA38, for example, or also create a transaction from it.
Provide report with the Query Designer (SQ01)
Another variant is to make this report available to a user group using the Query Designer. Often underestimated and yet it is very helpful.
SQ01 – Basic configuration
First of all, the environment from which the queries are to be displayed must be specified.

Since the previously created user query is client-specific, the working environment must also be set to be client-specific.

The next step is to specify a user group. If this does not yet exist, it must be created.
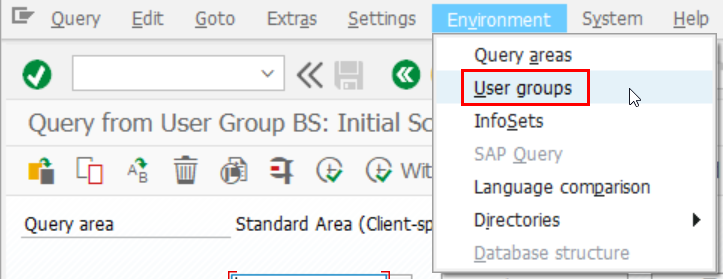
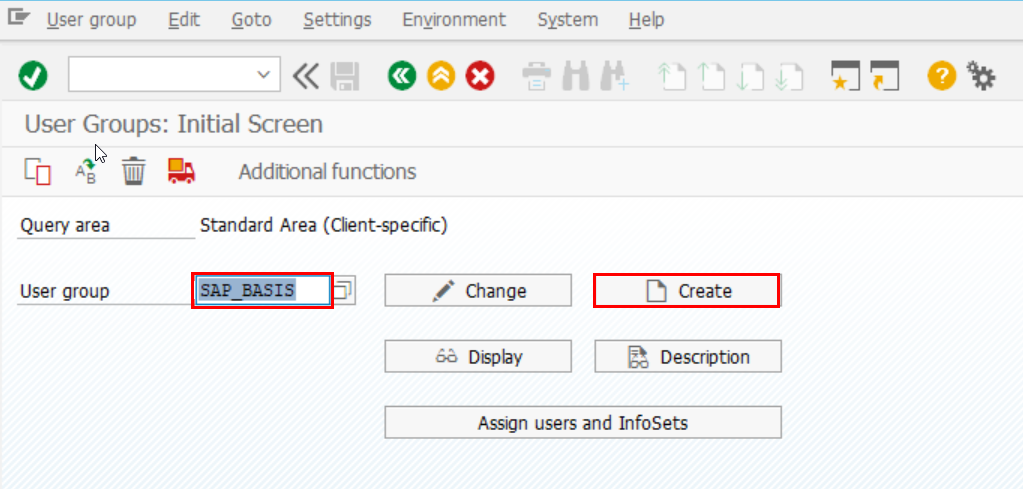
Once the user group has been created, it is still necessary to assign the appropriate users to this user group.
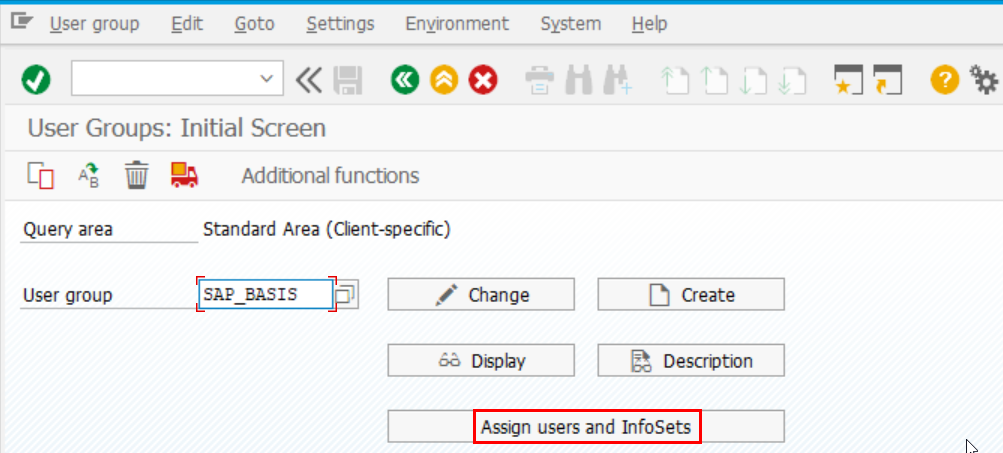
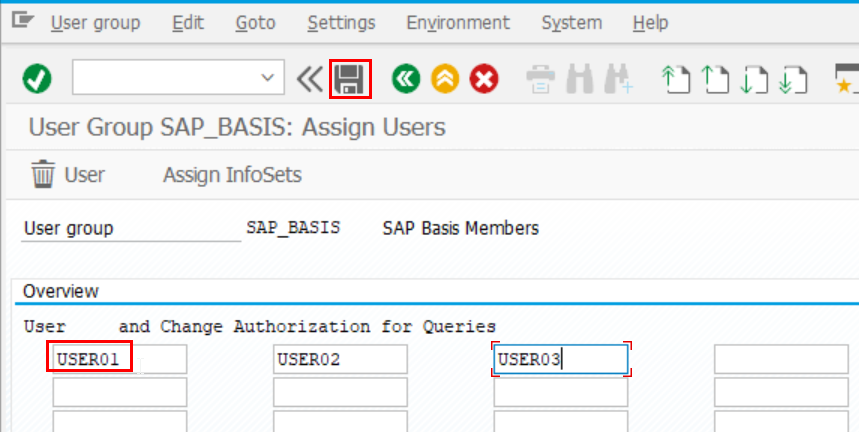
After the users have been saved, go out of this menu as well as the menu of the user groups with F3 and select the corresponding user group via the menu item “Edit”.
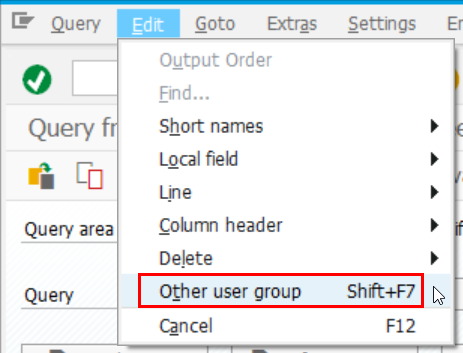
SQ01 – Convert QuickView
After the basic configuration is done, the actual QuickView can be converted and made available to the user group.
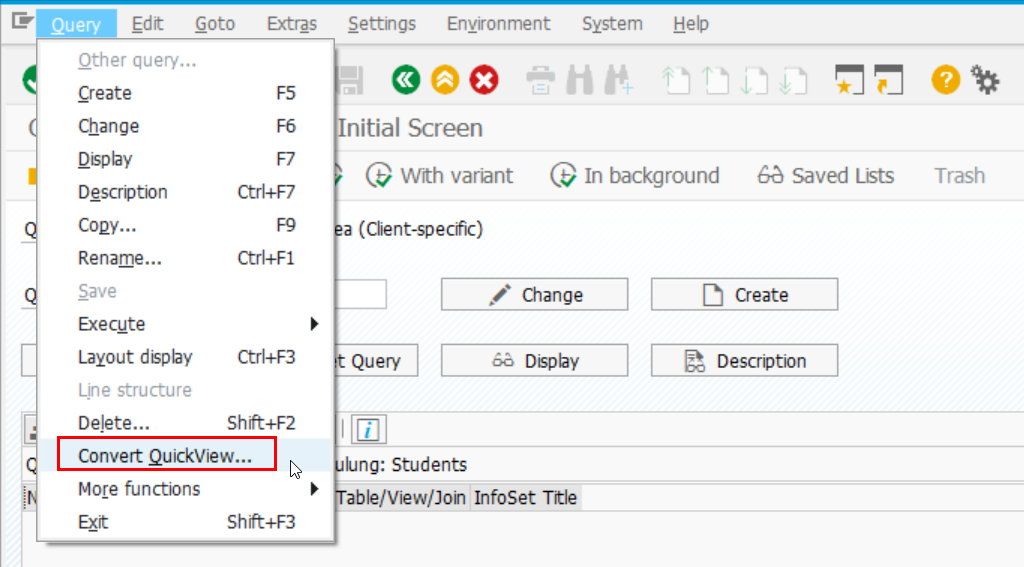
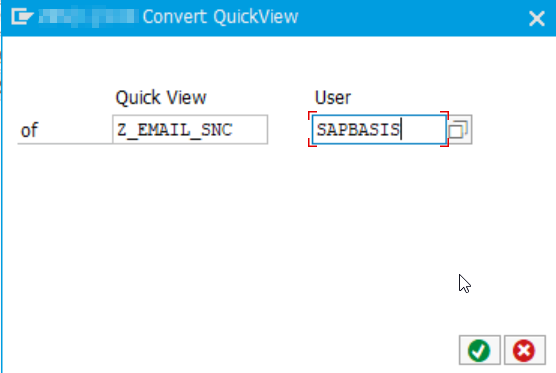
In the following dialog, the query name can then be specified under which this will be displayed to the users of the SAP_BASIS group.
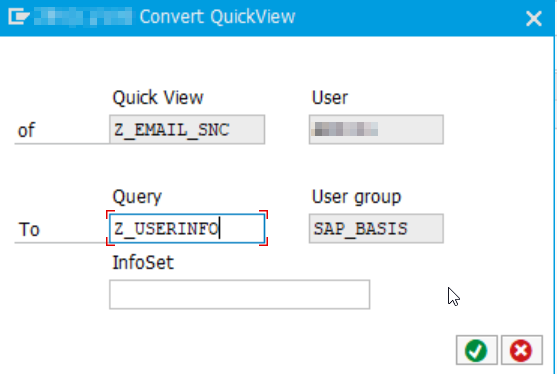
With this last step, everything is done. To use this query, users must call transaction SQ01, set the query area to client-specific, and select the correct user group.
With F8 the query is executed and the query mask appears again

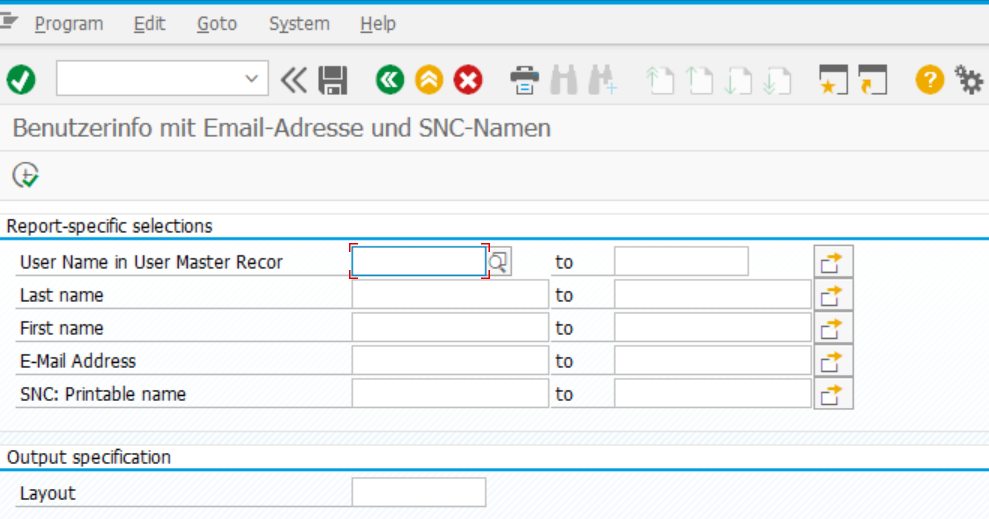
I hope that with this example I could show how relatively easy it is to create reports with the Query Designer and make them available to other users.
More information: help.sap.com: SAP Query